Journeys through the Eternal Empire - Part Two

Battle Reports & After Action Reports (AAR's)

Moderators: Slitherine Core, NewRoSoft, FoG PC Moderator

Post Reply
massina_nz
Lieutenant Colonel - Fw 190A
Posts: 1135
Joined: Fri Dec 18, 2009 12:12 am
Location: Wellington, New Zealand

Journeys through the Eternal Empire - Part Two

Post by massina_nz »

Image
Image

Well this time is a variation on a theme, and probably an army at odds with itself. Again a Horsey army, but with Knights as the hammer unit. I've slected the Middle Hungarian Crusader list, but didn't even purchase any Crusaders. It doesn't really matter, because I can get the same army from the Middle Hungarian list anyway.

I've gone for quality over quantity, as I expect the cavalry will eventually have to fight their way through. I suspect the trick with this army is knowing when to commit the Knights and keeping their flanks protected when they do commit.
massina_nz
Lieutenant Colonel - Fw 190A
Posts: 1135
Joined: Fri Dec 18, 2009 12:12 am
Location: Wellington, New Zealand

Placement

Post by massina_nz »

Image

TGM accepts my challenge with his Ottoman Turks– I’m up against one of the FOG elites – this will be a real challenge. I win the initiative, and go for the most open map I can find, to give my cavalry room to manoeuvrer and plenty of clear terrain for my knights.

I place my troops in the normal formation (for me); a screen of LH and two groups of cavalry, hiding the knights behind one group of cavalry, hopefully as a small surprise for my opponent.
stockwellpete
Field of Glory Moderator
Posts: 14500
Joined: Fri Oct 01, 2010 2:50 pm

Re: Placement

Post by stockwellpete »

massina_nz wrote: TGM accepts my challenge with his Ottoman Turks– I’m up against one of the FOG elites – this will be a real challenge. .
Nah, the Ottomans aren't all that. :lol:
massina_nz
Lieutenant Colonel - Fw 190A
Posts: 1135
Joined: Fri Dec 18, 2009 12:12 am
Location: Wellington, New Zealand

Post by massina_nz »

Image

Turkish MF hide away in the terrain on my left

Image

A few knights and superior armoured lancers on my left.

Image

My left wing advances – but stays 8 hexes away, that way I should be able to get the first shot in. I need to target the cavalry as they are the most dangerous to my forces.

Image

My right advances – knights are going to target the centre, with all the enemy foot archers, I really need to get into combat early, otherwise they will grind me down with missiles.
TheGrayMouser
General - Carrier
General - Carrier
Posts: 4999
Joined: Sat Nov 14, 2009 2:42 pm

Post by TheGrayMouser »

Oh man, these screenies show something that I never realized after playing for almost 2 years: YOU can see which units of mine are out of command, even though in some cases my leaders are actually out of your LOS. That aint right! (even worse I cant even see my own units out of command because i hate that darn hamberger-helper hand symbol and thus turn it off, lol)
Blathergut
Field Marshal - Elefant
Posts: 5875
Joined: Tue Jan 22, 2008 1:44 am
Location: Southern Ontario, Canada

Post by Blathergut »

eheheheheheheeeee :twisted:
massina_nz
Lieutenant Colonel - Fw 190A
Posts: 1135
Joined: Fri Dec 18, 2009 12:12 am
Location: Wellington, New Zealand

Post by massina_nz »

TheGrayMouser wrote:Oh man, these screenies show something that I never realized after playing for almost 2 years: YOU can see which units of mine are out of command, even though in some cases my leaders are actually out of your LOS. That aint right! (even worse I cant even see my own units out of command because i hate that darn hamberger-helper hand symbol and thus turn it off, lol)
When I see that symbol, it seems to me the enemy unit is putting their hand up to say "Shoot me", so I oblige :D
deeter
Brigadier-General - 15 cm Nblwf 41
Posts: 1956
Joined: Sat Sep 06, 2008 8:52 pm

Post by deeter »

This was brought up ages ago, Those little hands should only be visible to the owner. Maybe something for our volunteer coders to address?

Deeter
massina_nz
Lieutenant Colonel - Fw 190A
Posts: 1135
Joined: Fri Dec 18, 2009 12:12 am
Location: Wellington, New Zealand

Turn Two

Post by massina_nz »

Image

On my left, I advance and volley – concentrating on the Timariot unit on the right. I have better missile combat better odds versus cavalry and want to stay away from MF in the meantime.

Image

In the centre I’m surprised as some enemy LH advance too far forward, maybe a sacrificial unit in order to draw me in?

Image

I can’t resist the bait. I easily trap the most advanced LH, then manage to let one escape by being lazy and foolishly pursue after it, dumb move! I think all my cav should be able to evade away, but now the situation is too complex to work out the permutations. I try to protect LH that is locked with two LH on its’ left flank. My knights go to the right to stop the Turks flanking my line – this is earlier that I wanted to commit them.
massina_nz
Lieutenant Colonel - Fw 190A
Posts: 1135
Joined: Fri Dec 18, 2009 12:12 am
Location: Wellington, New Zealand

Turn 3

Post by massina_nz »

Image

My cavalry on the left scatter and the enemy MF cut off their potential escape route to the left, so they need to head for the centre of the map

My LH inflicts a fragment in melee (A) during my opponent’s turn. It will definitely need to rout its opponent next turn or my LH will be history – but it fails to do so, and will be toast in my opponent’s turn.

Image

The opposing Serbian knights advance (A) and scatter most of my cavalry, one Turkish cavalry unit follows into my knights (B)

Image

My cavalry still retire. They are running out of room to do so as the map edge approaches, and will have to face up next turn – however they do reduce one enemy cavalry unit <75%.

Image

On my right the Turkish cavalry is only disrupted – I’m in no hurry to rout it, as I will need to cover the pursuit move with my other knights. I make the most critical mistake in the whole battle (with the benefit of hindsight) as I allow the flank of one of my knight units to become exposed. I knew as soon as I moved it, I was in trouble, and so were my knights.
massina_nz
Lieutenant Colonel - Fw 190A
Posts: 1135
Joined: Fri Dec 18, 2009 12:12 am
Location: Wellington, New Zealand

Turn 4

Post by massina_nz »

Image

Yep My LH gets charged from behind and it gets fragmented – but I rout his LH in my turn.

Image

The knight on my far right gets fragmented- as it couldn’t turn to face.

Image

LH move to escape –I attempt to keep out of charge range or else they will evade off the map.

Image

Turks are weak in the centre, my knights don’t fight so well again – they have been underwhelming – if the selected his knights charge in I will get rear shot at the Serbian nobles next turn. A couple of my cavalry hit his archers, both disrupt, but one of his cavalry should be able to charge mine.
massina_nz
Lieutenant Colonel - Fw 190A
Posts: 1135
Joined: Fri Dec 18, 2009 12:12 am
Location: Wellington, New Zealand

Turn 5

Post by massina_nz »

Image

On the left the MF start to herd me. But MF in the open and the MF are facing the right way, just have to charge with cavalry and protect the rear hexes from the Ottoman cavalry.

Image

On the right the knights are under performing but one rear attack is possible.

Image

In the centre an Ottoman armoured cavalry catches up with mine.

Image

On my left my cavalry hit home and cause a disruption. I try to cover their rear hexes with my LH, but he could clear them away with his bows. However that opens the bows up to cavalry attacks, my opponent’s cavalry is down to 58% and disrupted, so may not even charge in.

Image

I’m able to rout an archer, which frees space for my LH to escape next turn. I also charge the archers on my right. They should be safe form rear attacks for at least one turn.

Image

I fragment a knight with a rear attack but don’t rout it despite good odds, so my cavalry at the bottom of the picture have to perform a blocking action now.

Image

Things go from bad to worse for my knights.
massina_nz
Lieutenant Colonel - Fw 190A
Posts: 1135
Joined: Fri Dec 18, 2009 12:12 am
Location: Wellington, New Zealand

Turn 6

Post by massina_nz »

Image

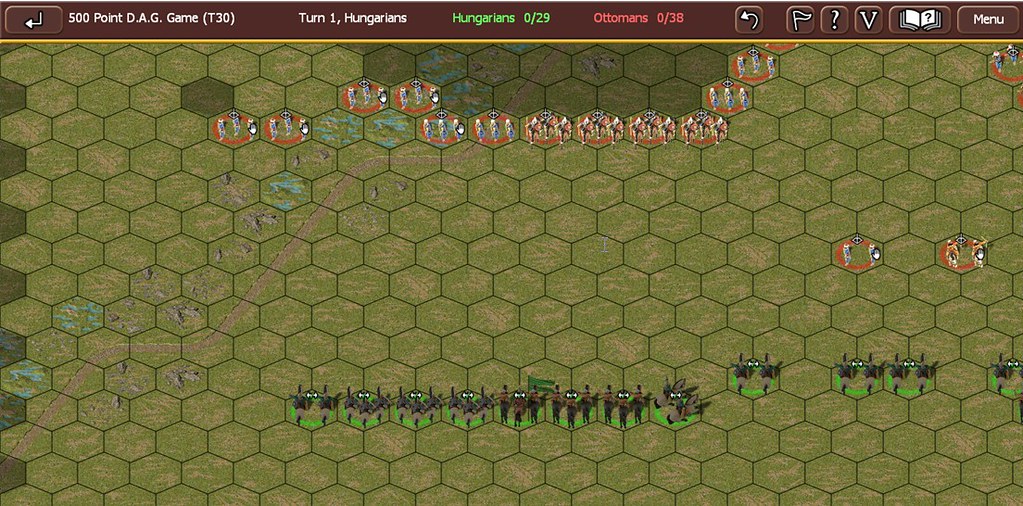
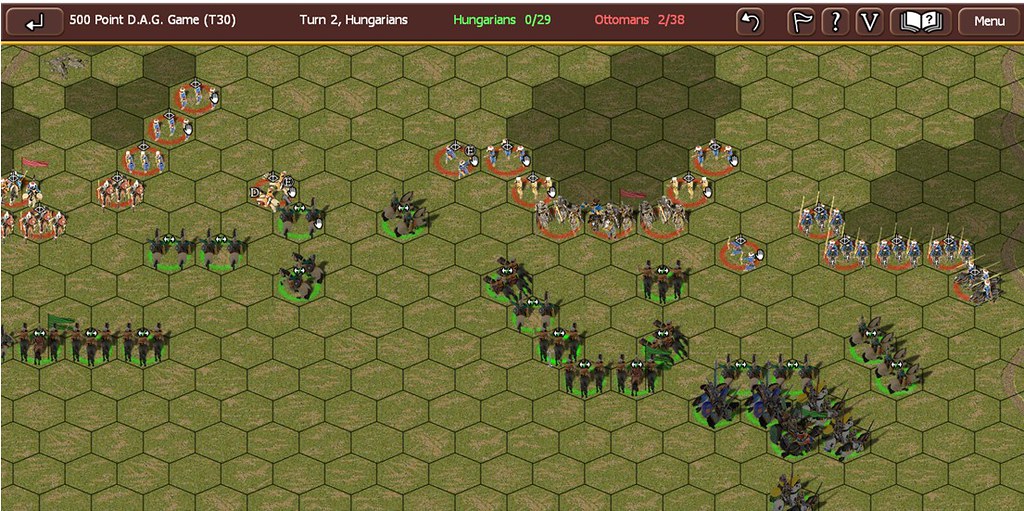
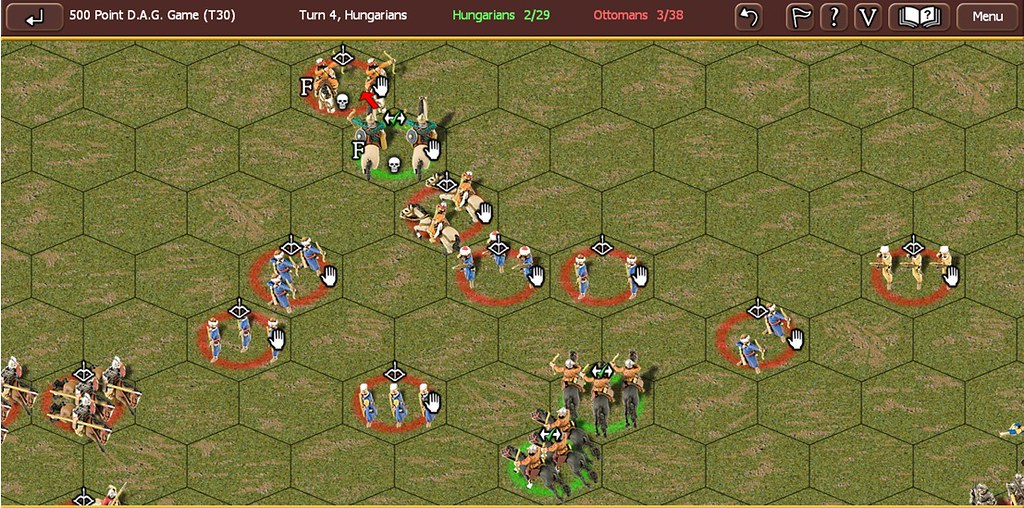
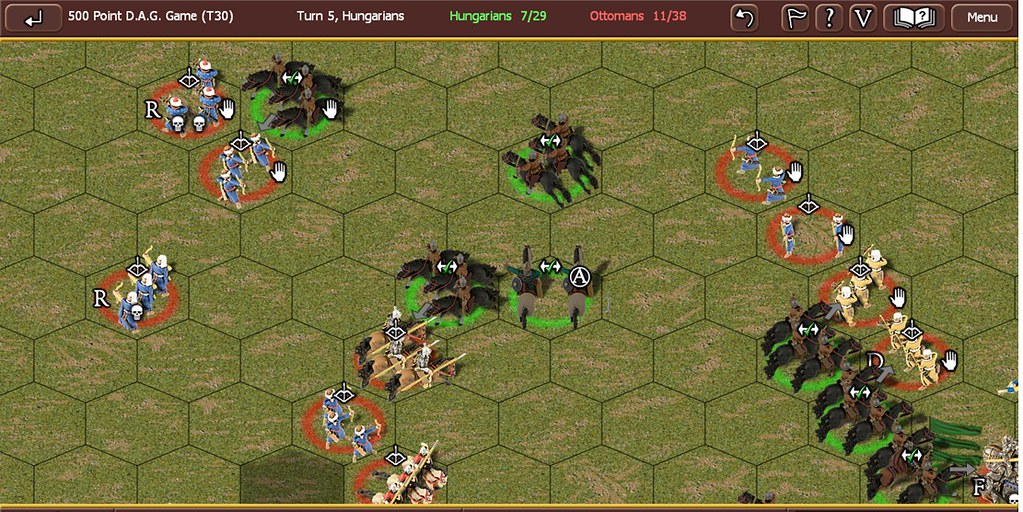
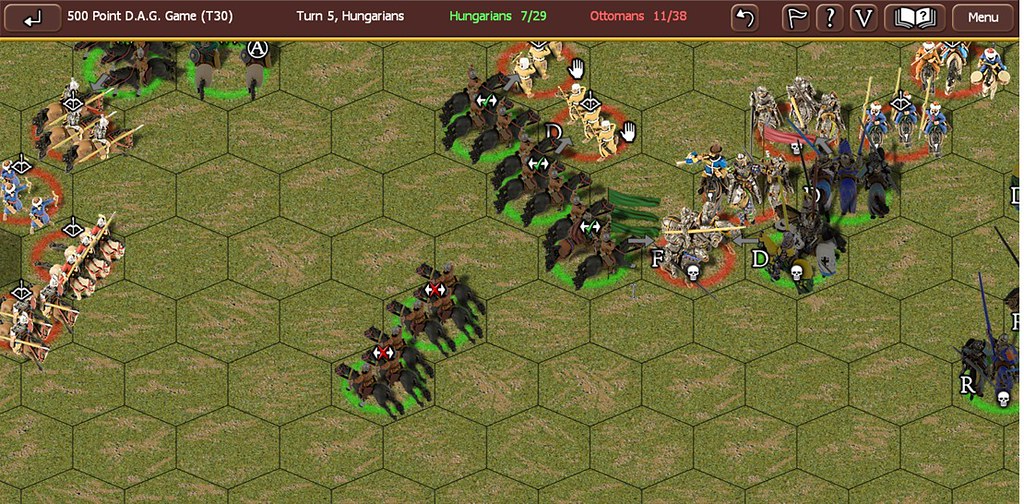
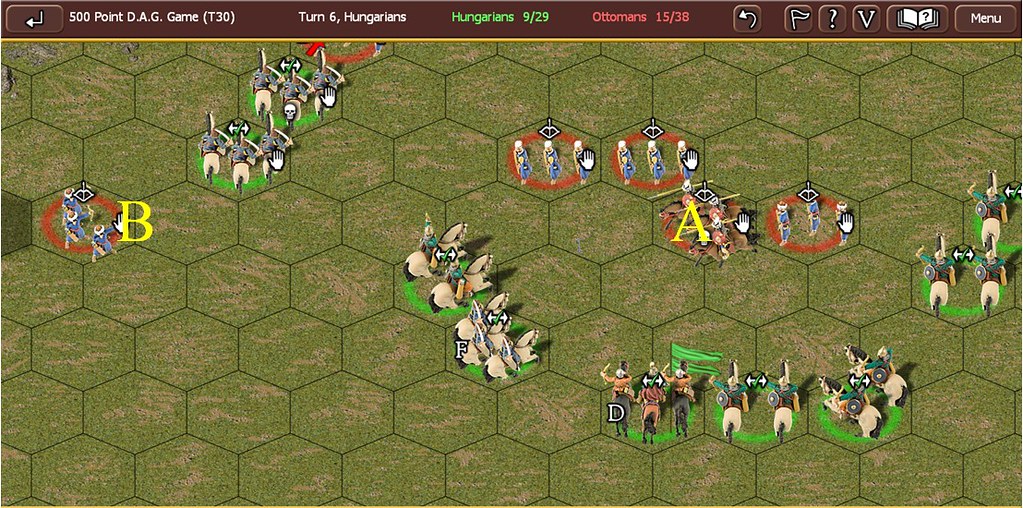
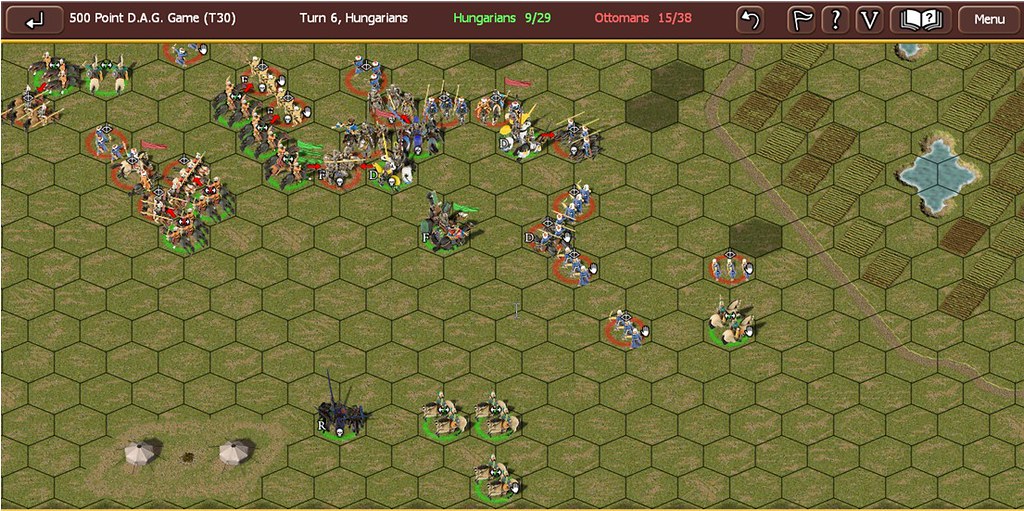
On my left, the bows rout and the Turkish cavalry refuses to charge (A) – note the possible rear attack (B) and my LH are only 5 hexes from the map edge. I’ve run out of room.

Image

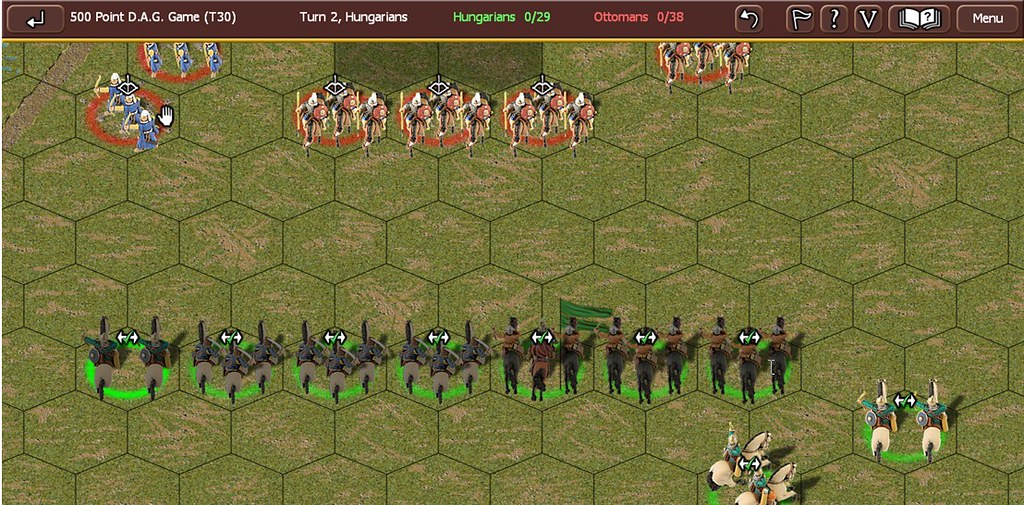
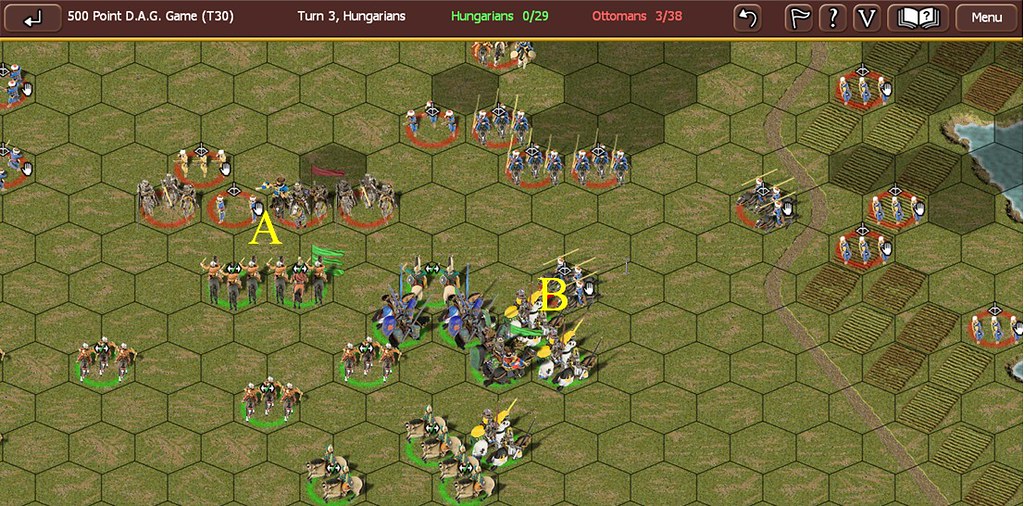
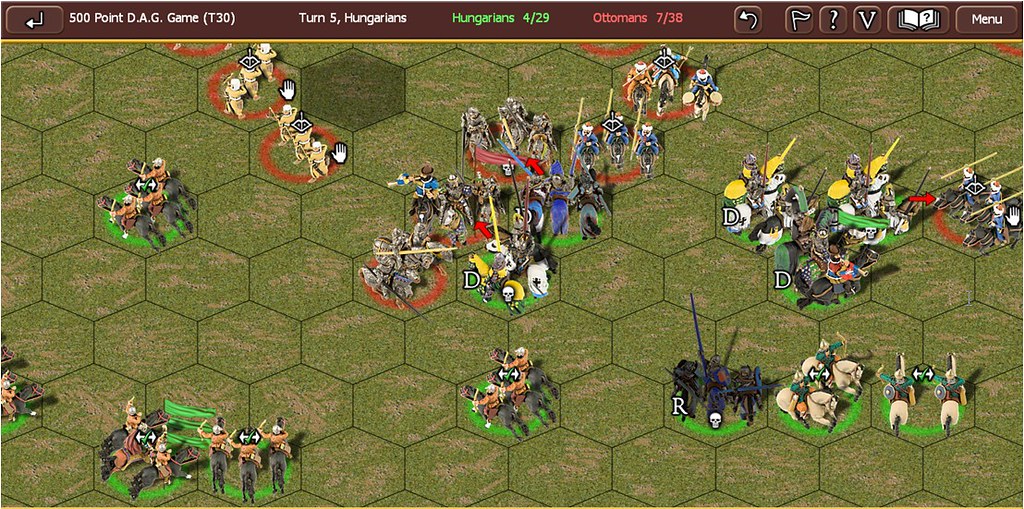
My outmatched lesser armoured cavalry thankfully don’t disrupt during combat (A), but the Turkish bows fragment (B).

Image

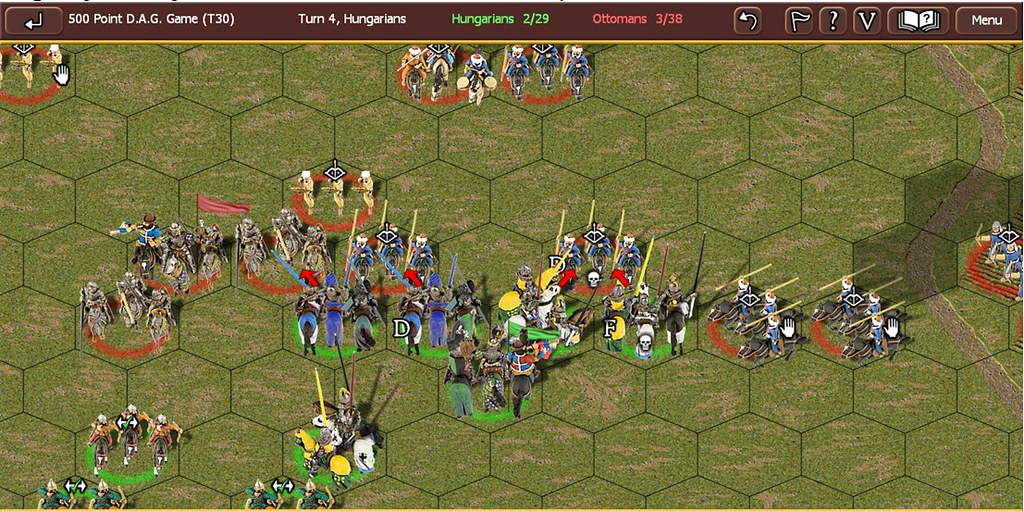
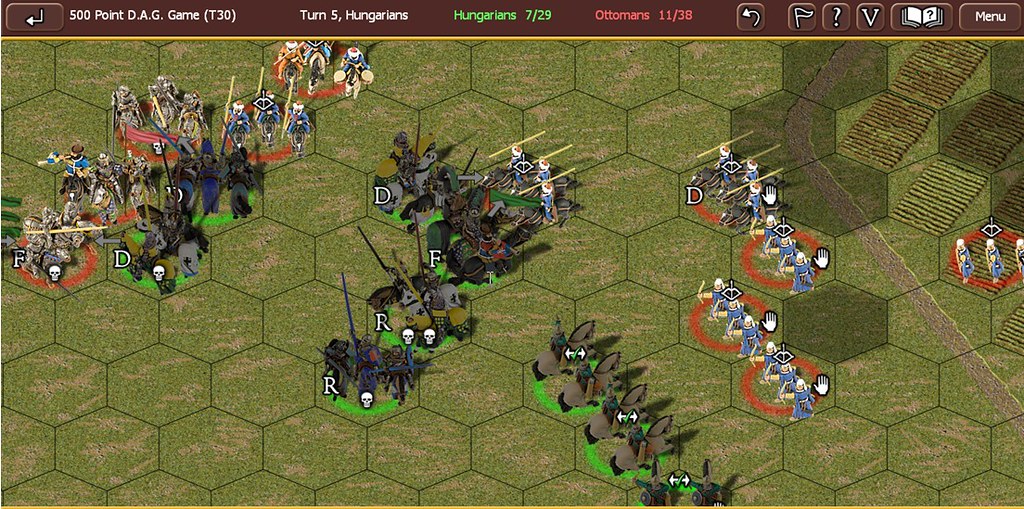
My knights are on their last legs, an my LH now have to be very careful being so close to the map edge.

Image

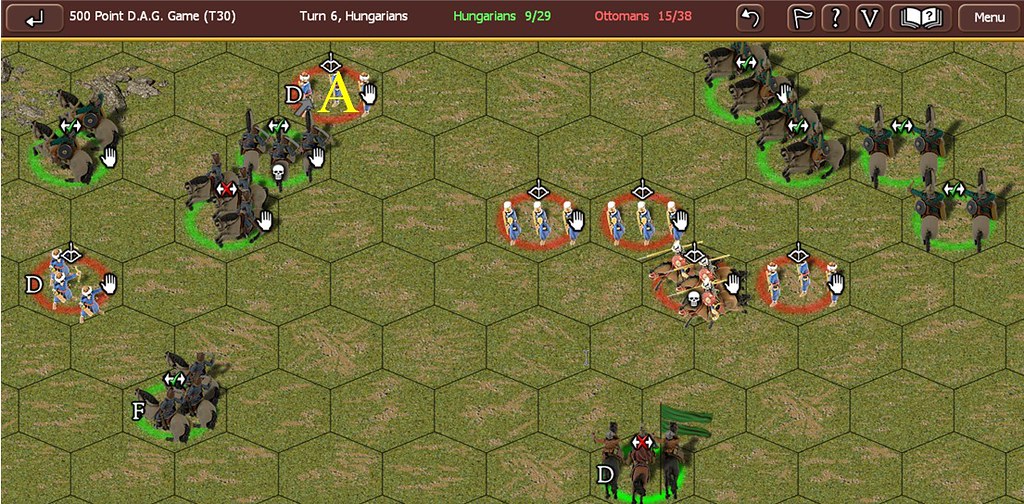
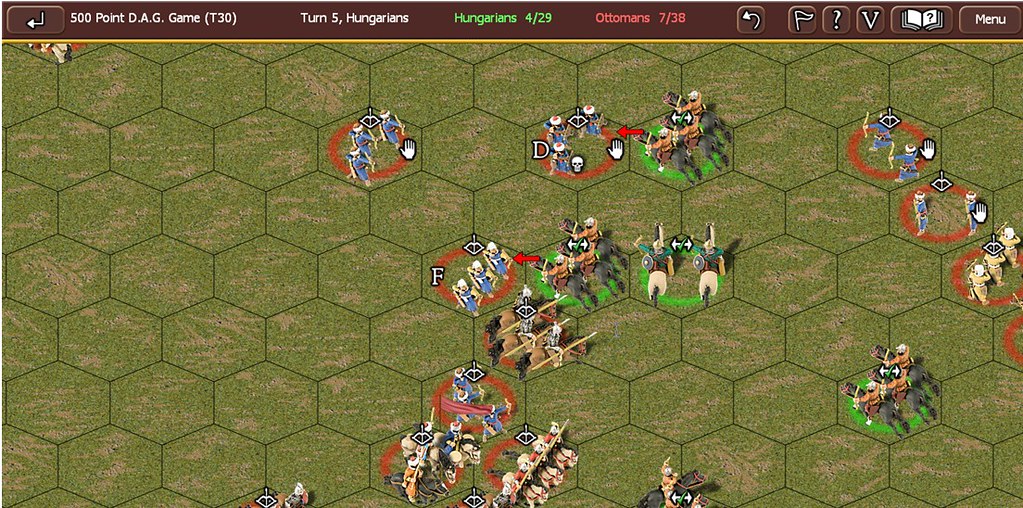
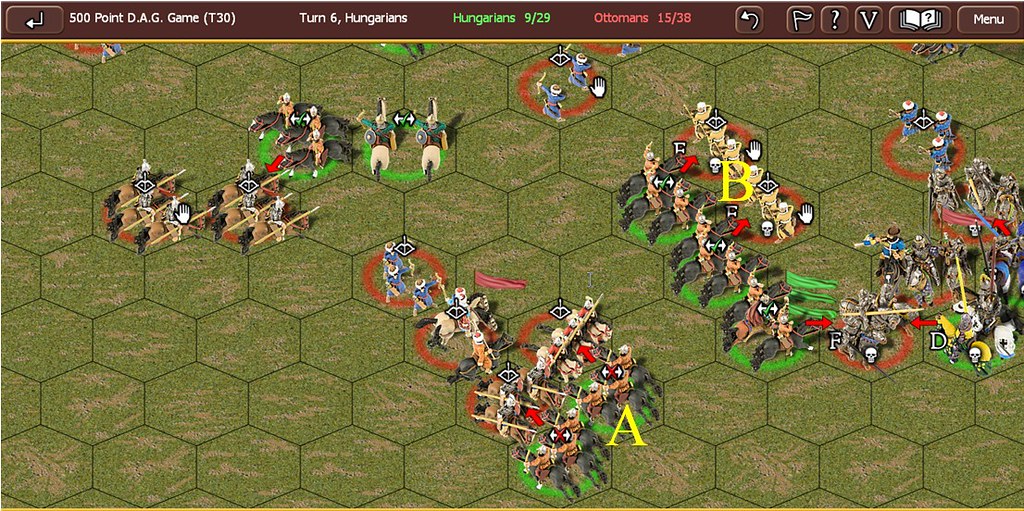
I run the enemy cavalry down below 50%, but not enough to auto-rout. My commander has to stay where he is, hopefully he will recover cohesion at end of turn. I’m not able to fragment the enemy bowmen at (A), so have to turn my other cavalry unit to face the enemy unit behind. If I had achieved a fragment during melee combat I could have then charged in to rout the fragmented unit, and the ensuing pursuit moves should have taken the cavalry out of range of the bowmen.

Image

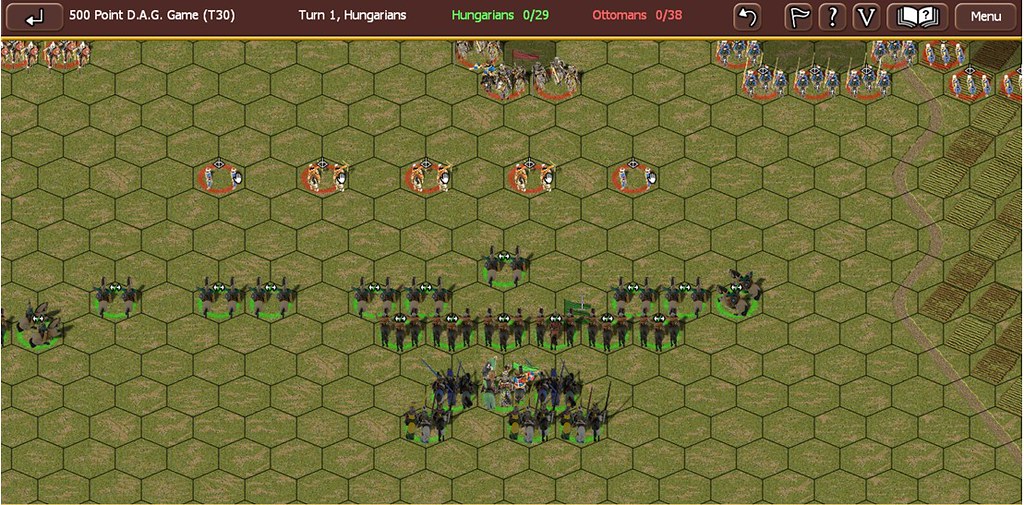
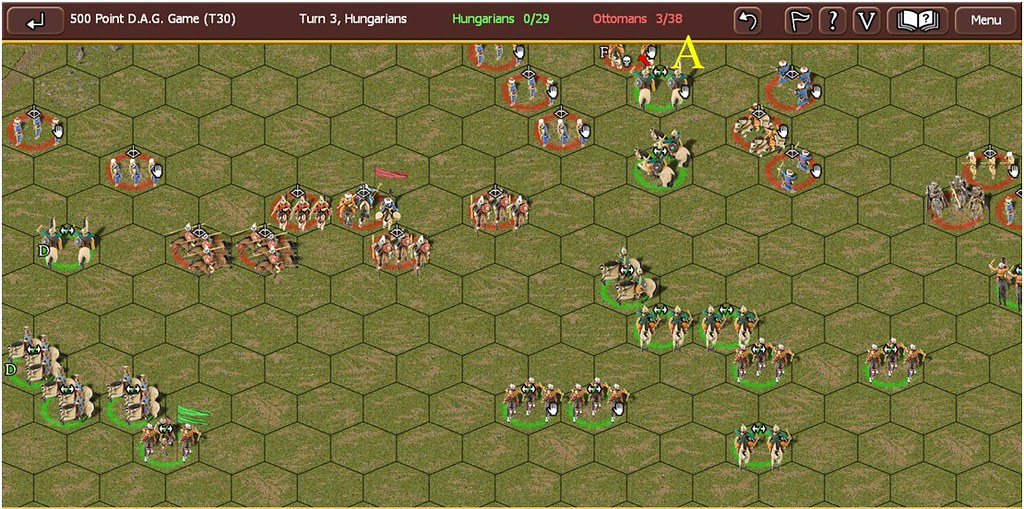
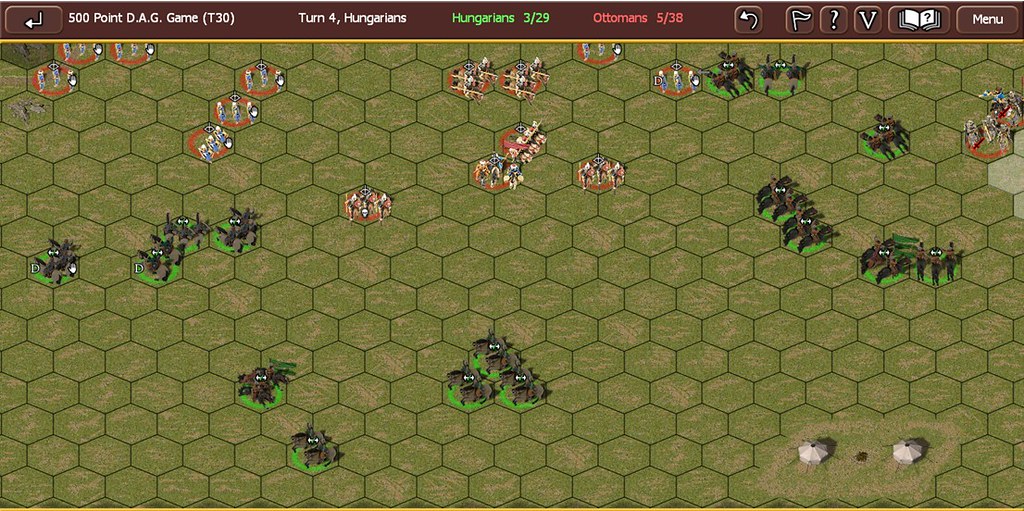
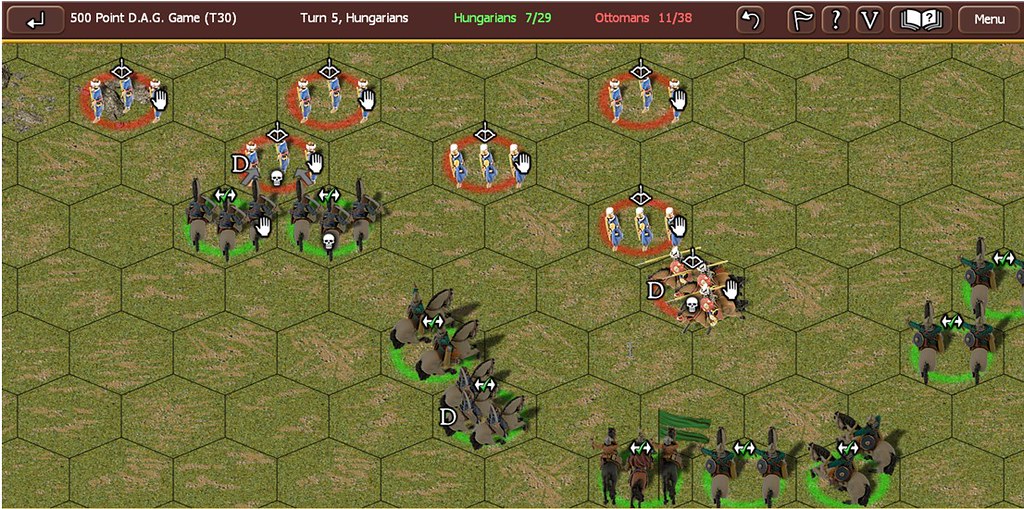
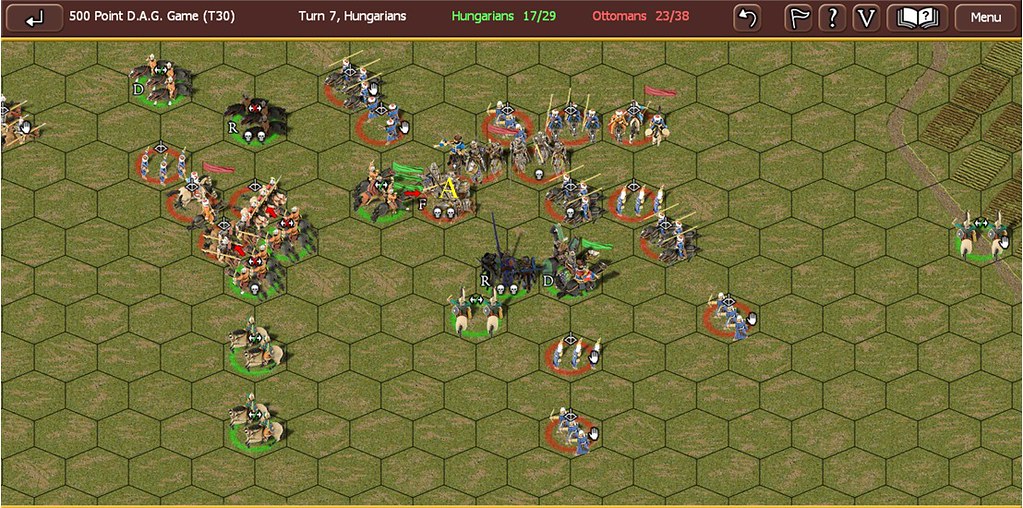
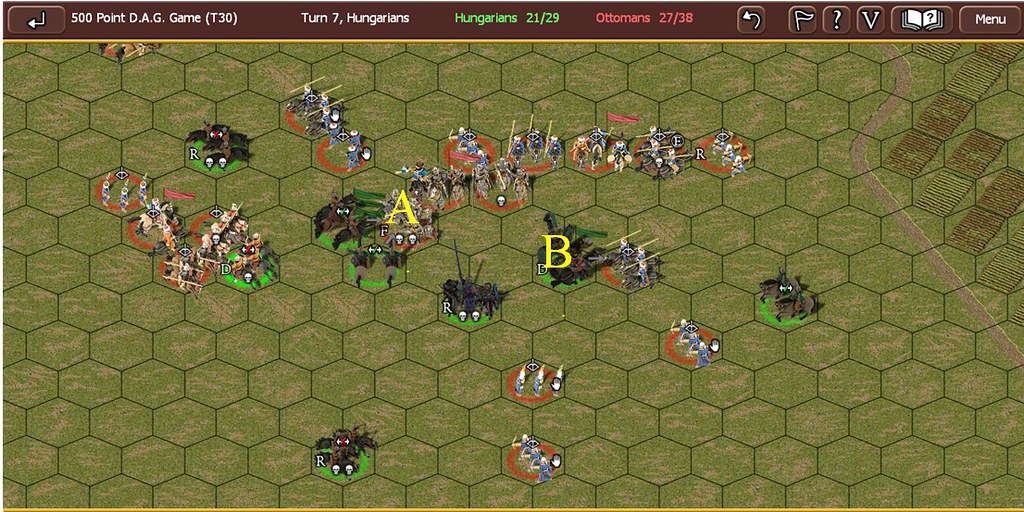
In the centre I’m able to rout one bow unit (A) and catch some enemy skirmishers (B)

Image

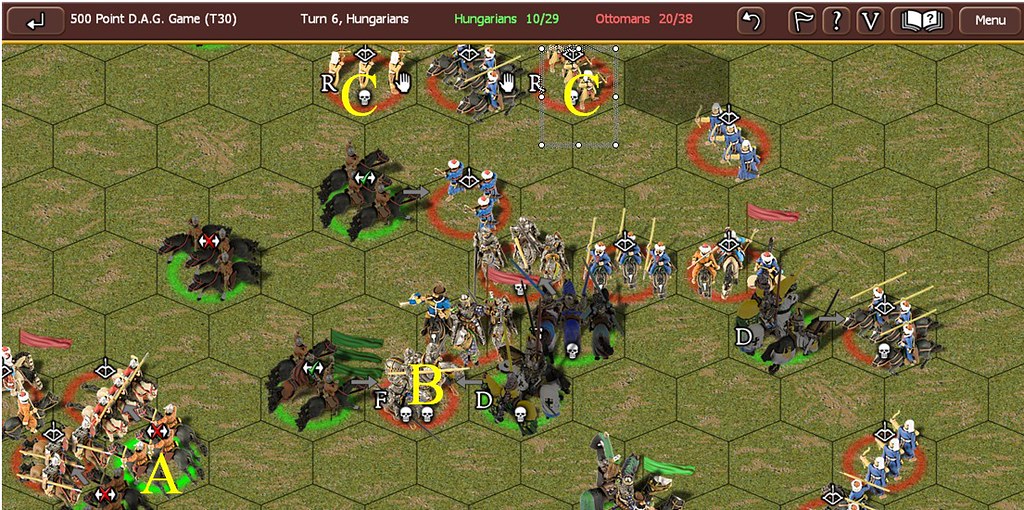
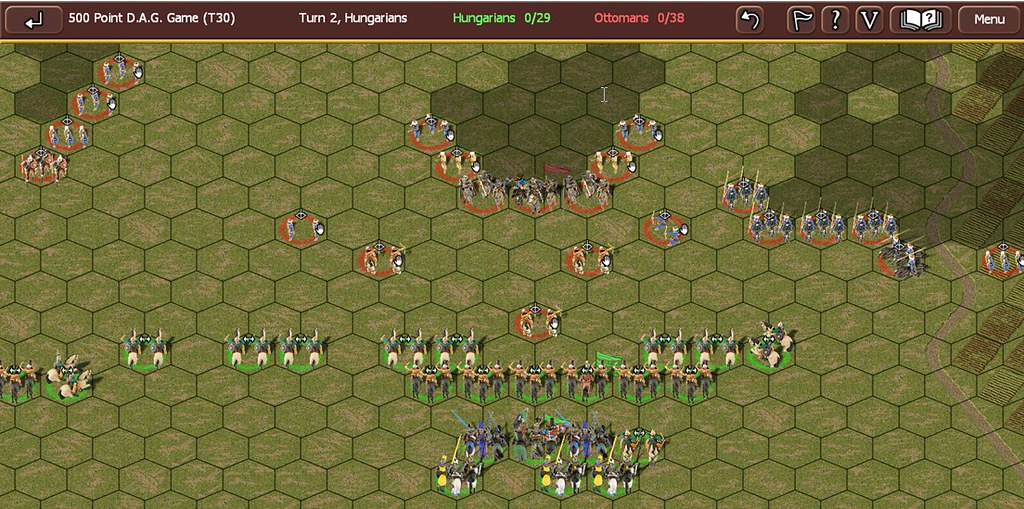
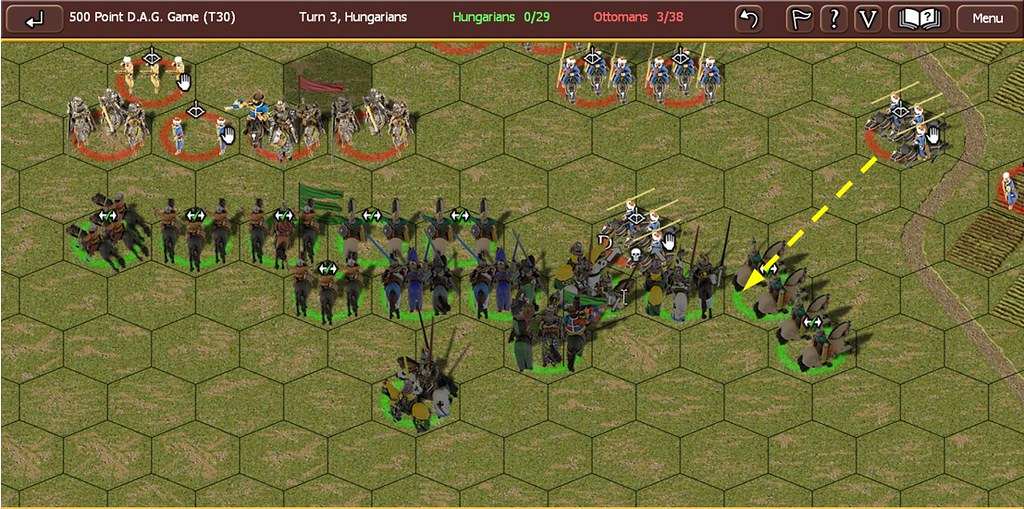
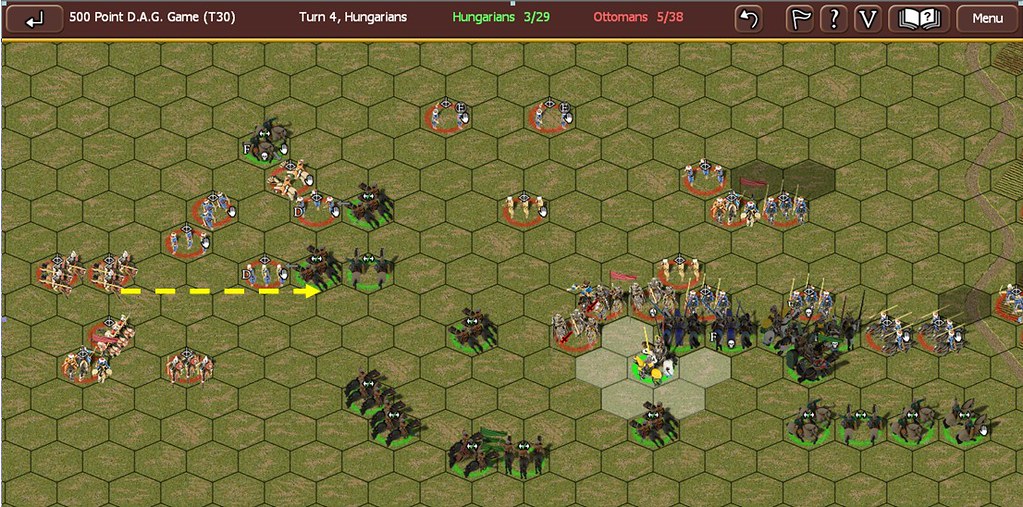
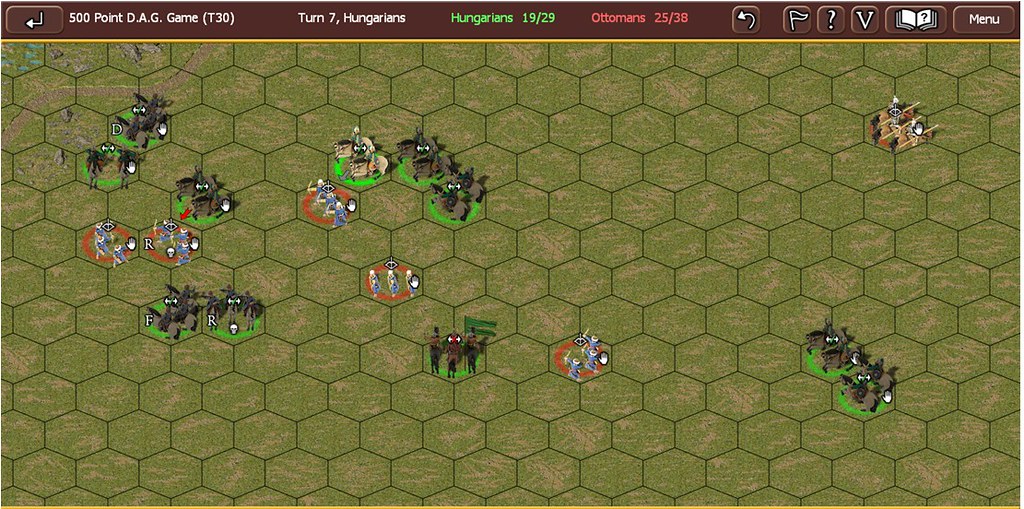
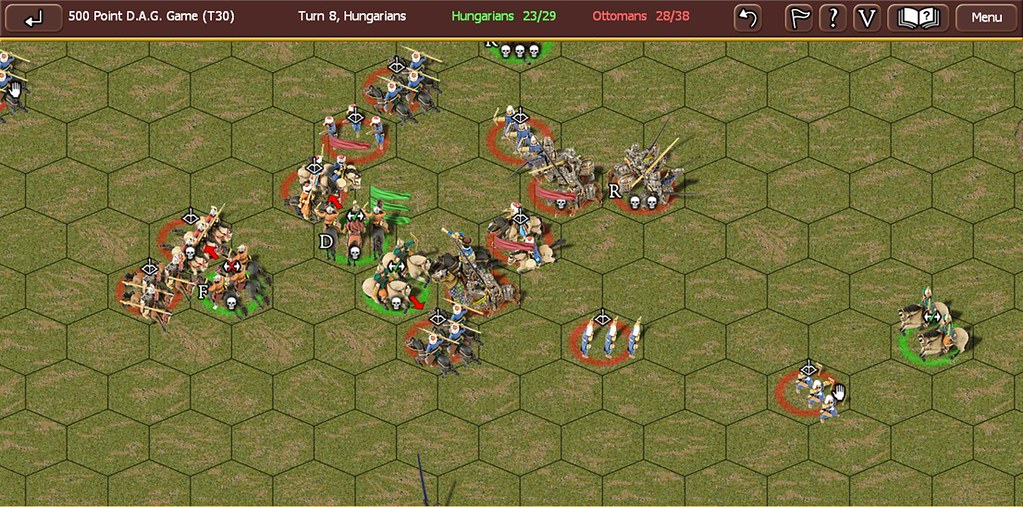
My cavalry on bottom left hold on well again (A). Somehow the fragmented knight (B) survives (I attacked with my disrupted knights first, as they had better odds than against the steady enemy commander. Both of the fragmented bows rout (C)

Thankfully both my commanders recover cohesion at end of my turn
massina_nz
Lieutenant Colonel - Fw 190A
Posts: 1135
Joined: Fri Dec 18, 2009 12:12 am
Location: Wellington, New Zealand

Turn 7

Post by massina_nz »

Image

Nasty – my cavalry that pursued into the Ottoman foot bows last turn, then evaded when charged – opening up itself to a rear attack, from which it routed – never expected that. One of my knights folds then two others get opened to rear attacks.

Image

More weirdness. One of my cavalry units wins in battle, but goes over the auto-rout level, both units rout! But my routing unit break through a friendly cavalry unit, so unit now disorders and refuses to charge. One of my LH units does charge and routs another bow. The LH pursuit move opens itself to a rear attack next turn, so have to attack a bow unit with another LH to lock it in place.

Image

That fragmented Serbian knight (A) holds out again! My commander (B) is toast next turn so it charges in and routs a bow with a rear attack, the game is now over, there is at least six easy BPs for the Ottomans next turn. My knights were underwhelming, triggered off by that flank attack earlier in the game and some superlative fighting by the Serbian Nobles.
massina_nz
Lieutenant Colonel - Fw 190A
Posts: 1135
Joined: Fri Dec 18, 2009 12:12 am
Location: Wellington, New Zealand

Turn 8 and last

Post by massina_nz »

Image

Somehow the LH holds out and finally the fragmented knights rout – during my opponents turn all three units in the middle of the picture rout and the game is lost.
Post Reply

Return to “Field of Glory : AAR's”