Legion Arena walkthrough

PC/MAC : A belnd of role playing game and RTS following the story of the mighty Roman Empire.

Moderator: Slitherine Core

Post Reply
Aleksandr
Administrative Corporal - SdKfz 251/1
Administrative Corporal - SdKfz  251/1
Posts: 142
Joined: Sun Feb 14, 2010 5:29 pm

Legion Arena walkthrough

Post by Aleksandr »

LEGION ARENA walkthrough.

So, after a dozen of finished runs of stock Legion Arena campaigns, I realized that I could make this little "walkthrough". Note that this isn't "the one and only way how to win"; it's just something I discovered after many hours of playing Legion Arena.
It's more fun than serious thing. I may add a few pictures from time to time... :)

I've started a new Very Hard run of the Roman campaign. Btw, I don't play the stock campaigns at any other difficulty.
My goal is to finally break the 1 140k threshold. I need to play very cautiously and I must not spoil the battles. Contrary to my previous runs, I'll try to not lose much men during the "hold for X minutes" scenarios - instead of focusing on as many experiences as possible, I'll focus on mere survival - even if it would mean that I'll use extraordinary units or tactics.

Before we start, lets take a look at few details:

Gameplay.
I will use "pincushion" units whenever needed. Pincushions are bought for the particular scenario and their goal is to absorb enemy arrows, make a suicidal attack to open a hole in enemy formations, or to lure enemy into traps, etc. They are dismissed without healing, and although they eat away a part of the experience bonus, they're more than helpfull. They range from anything from Peasants to Legionaries, but most of the time I buy Militia (when I have few Denarii) or Spearmen/Hastati (when I need more robust unit).
Except for the times when absolutely necessary, I won't be using temporal units at all. Tempo units are squads that are bought any time during the campaign and that accompany the army for any number of scenarios; they are used and healed as normal squads, but are dismissed after they're not needed anymore. Although helpfull, these units tend to eat experiences and of course: fame.
I'll be trying to not replay a single one battle. This is very hard to achieve, as it means that I must win more than sixty battles in a row. However, part of the reason for this is that one may crawl through the campaign with anything possible, but this does say very little about the army's efficiency.
As written - I won't change the difficulty setting and I won't replay scenarios for a better result - unless, of course, if I'd be defeated.


Tactics and purchases.
Most of the times I use ten units only, because they are easy to manage, gain experience fast and most notably, don't need too much healing. I also like when I got my men in the left row only. It could be better to use a bit more units, however I like to play it this way.
Target army (a "core") is four Auxilias, four Archers, and one AuxCav. Once I'll build this army, I will upgrade the stuff. I may buy some stuff even sooner, e.g. Archers' equipment is bought asap, for an obvious reason.
As you may see, I'll go for the all-light army. This is very cheap to heal, but it needs some managment. Battles in open terrain can be hard. That's where I will purchase heavy pincushions. Towards the end of the campaign I often use Triarii or even Praetoriani - best pincushions ever. 8)


Tactricks.
Trample, disengage, trample. A cavalry tactic - friendly squad attacks the enemy, than disengages immediatelly and then attacks the same enemy once again. Result: high number of instanto kills. Pros: low losses. Cons: some horsemen (or even the whole squad) may remain trapped in an enemy formation; disengagement bug may cause the squad to go gaga.

Sieve. A cavalry tactic - friendly squad rides into the enemy rear and then turns back to the fray, overruning both the routed and the still fighting enemy squads. This vertical there-and-back movement may be used as many times as possible, so that the cavalry overruns as many routed enemy as possible. Pro: large amount of experiences that can't be gained by another means. Con: eats loads of order points; distracts player from the rest of the battle; cavalry is unusable for other tasks. Hint: once it is clear that the battle will be over in few seconds (e.g. time limits is at the end, there's one last enemy squad, etc.), direct the cavalry in a reasonable place to overrun the routed guys and don't click anymore, not until the last guy is overran. You don't want to accidentally finish the battle if there are still some free experiences literally running around.


Skill tree and equipment:
Nothing spectacular here. Balanced hand-to-hand infantry, machinegun-like archers, cavalry with an emphasis on high Trample and fast Frenzy.
Legate is not meant as a primary combat unit, but otoh, why not use him when possible? So the main concern is fast tactical skills, lately the combat circle.


Shortcuts:
Trample, disengage, trample aka TDT. See above.


[TBD]
Last edited by Aleksandr on Sat Jul 07, 2012 9:15 pm, edited 14 times in total.
Aleksandr
Administrative Corporal - SdKfz 251/1
Administrative Corporal - SdKfz  251/1
Posts: 142
Joined: Sun Feb 14, 2010 5:29 pm

Re: Legion Arena walkthrough

Post by Aleksandr »

I won't waste your time with a detailed battle plans for every little skirmish, and namely the opening minicampaigns will be described without unnecessary details.

Latium (the first minicampaign):
Pretty straightforward. Dismiss all your starting units and get the Auxilia. Keep them with the Legate. You shouldn't even heal them for the whole minicampaign; maybe you won't even lose a single guy until the last scenario.
You'll win the first two scenarios without any problems. There's no reason to do anything during the Sabine Ambush. You won't be given any experiences for the killed enemy men. Just hide, so that you don't lose someone.
Don't purchase pincushions until the Scout the Etruscans, where you'd wish to get rid of the enemy Skirmishers, so that they don't hurt your core guys too much. Either you may TDT them with Scouts, or attack them with Velites. No matter what, you need to either kill them or at least let them waste the ammo. Then the Auxilia will eat the enemy alive and won't even spill the bones, so your only goal is to not lose Legate. And it's an easy task.
You may also try to win with just the Auxies, to gain more experiences. But well, we're playing a wargame, not a lottery, so...


The Early Republic (the second minicampaign):
"The Roman Republic was established when Lucius Tarquinius Superbus, the 7th and last Etruscan King of Rome, was overthrown after his son raped Lucretia."
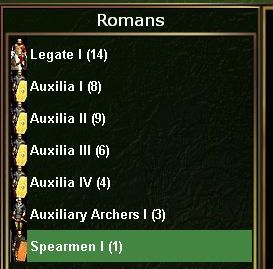
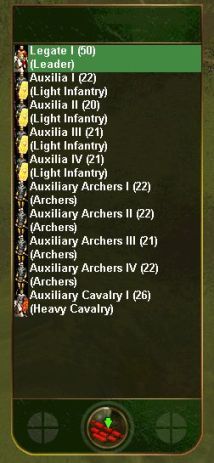
You're entering this minicam with a Legate at level seven to nine, Auxilia at level three and 315 Denarii. Purchase the second Auxilia squad for three hundred gold, and buy yourself a drink for the remaining fifteen Denarii.
Legate should have some mix of tactics and combat skills - after all, your army is too little to a) not use Legate as a real unit and b) to need many order points.
Hide your unis in the SE forest during the Aequi Riders. When I'm in a mood to bother myself, I try to TDT few Skirms with a Legate, but well... you know...
So just wait in a defensive line and let the enemy units break on your superior men. I wouldn't try to capture the Skrims in the open, as the enemy Scouts may do the same to your Auxilia.
Hernici Farmers is completely the same, just wait for the enemy to come. Two Auxilias are enough to win this fight.
It's quite possible that your Auxies will bloody their noses a bit. They'd still do better than the Legate.
Image
There's a very solid tactic for Coriolanus. Purchase Scouts and let them wear green T-shirts, so that their icon matches their colour. This is very important... 8)
Then hide the Auxilias together with the Legate in the forest. Set Scouts to defensive formation and charge one of the Skirmishers. TDT them (it is quite important to get away from the central heavies, so that they don't interact), than TDT the second Skirmishers. Then finally provoke both the central Spearmen, take care to not provoke the enemy leader - you want him to survive. Lure the heavies into the forest, where Auxilias destroy them. Once this is done, move the Auxies to the flanks and run for the enemy light infantry. (While they are moving to the positions, you may overrun the routed heavies, but don't expect that Legate will hit many of them.) Then get rid of Coriolanus alone.
You may purchase pincushion with Spearmint flavour for the next battle, the Latin Dispute, but if you don't want to waste experience, and rather lose a bit of fame, buy the third Auxilia. There's a trick how to avoid been trampled - put your Legate in the middle of the first row. Once the enemy comes closer, he'll run against them and the cavalry will suround him instead of trampling the Auxilia. But you may lose your leader, of course... Either way: put your guys on one flank, so that they don't fight both cavalry at once. After you'll get rid of them, win the hand to hand contest. Btw, it's quite a good idea to keep one Auxilia against the enemy Skirmishers. (I've lost 23 men of my new Auxilia, but I find it better to make some levels asap - mainly because MiB is ever closer -, than to purchase a pincushion unit to eat the arrows.)
There is a large area of boggy ground all around the Etruscans At Caere map, so just run into the harsh terrain and lure the enemy heavies into it. I placed the best Auxilia on the right flank to get rid of the Skirmishers. You may also use pincushions to eat their javelins, of course. Be careful to keep the fight in the boggy ground, exactly as the briefing says: the Auxilias tend to chase the enemy and run into the open...


Gauls and Latins (the third minicampaign):
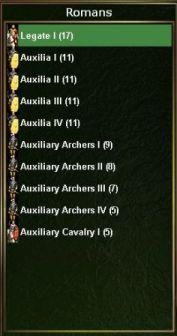
You're entering the third minicampaign with a solid force of three Auxilias and quite an experienced Legate, but you lack five pennies to make a real firework. Nevermind, lets see what we can do.
First of all, the next scenarios are quite hard, with Men In Black been the singlemost difficult battle so far, hands down. You need to counter the enemy elite (level 17) guys. And fortunately we know how to do that. Purchase a pincushion Nobles, set them to defensive and place them right against the men in black ordered to charge them. Rest of our guys formes a column on the right side, and set them so that they maneuvre into the rough. Envelop is the best way of movement, as it takes a lots of time until they run for the enemy - and you don't want to chase the heavies in open field, do you? Once the battle starts, manually move the leader into hiding, as you don't want him to interfere; remember, you can't lose him. Then TDT the MiB at least twice, but if you'll have enough order points, make it three times. (Once your cavalrymen disengage and run a bit, you may change the formation into balanced and gain some order points, but be careful, because it's not a best idea to tinker with these settings if one or more of your men is still too close to the enemy squad.) However, once the things start to look dangerous, it is better to NOT DO anything, as you need the Nobles to withstand as long as possible and to make some damage to the enemy elite. Not before long, your horsemen will be routed, but MiB should be in a really bad shape. The last stage of this battle is going to happen in the rough terrain (don't forget to Halt your guys in there), and if you wish to pester yourself, you may even try to overrun routed enemy with your Legate.
I've seen better results than this one, but whatever... Win is a win. (Nobles had done very little this time, normally they trample some ten men in black, but not tonight.)
I reassigned the Nobles and bought a fourth and the last auxilia for the Gallic Scouts. I formed my units into a vertical line and rushed them into the rough, where the enemy cavalry can't harm them. Easy, isn't it?
I used the very same vertical line during the Thirst for Gauls scenario, except for one thing - there are Peasants pincushions at the top. Keep your guys in the harsh terrain and you're golden. The left flank is covered by the Hastati, so that the enemy doesn't fire at the core squads. Pincushions should slowly move further, the rest of our guys wait in the mud.
(edited) I've bought a core Archers and a pincushion Scouts to weaken some of the Lingering Gauls. Reason behind this decision is the amount of enemy Skirmishers that I really wanna get rid of. There are too many of those javelinmen and I don't want to see my core bleeding. Plan is as follows - 1) keep the core in SE corner, 2) ride down as many Skirms as possible, 3) profit. Quite an elaborate plan, true? (edited)
note: I mistakingly wrote some nonsenses about the last scenario. These are fixed now. It's quite messy to play the game, write the stuff, check the savegames, etc. Sorry for the inconvenience.


The First Samnite War (the fourth minicampaign):
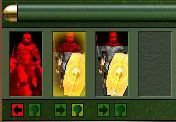
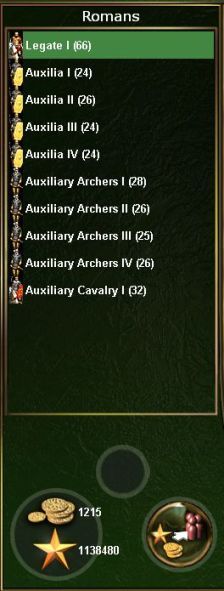
This is my army before the first battle of this minicampaign:
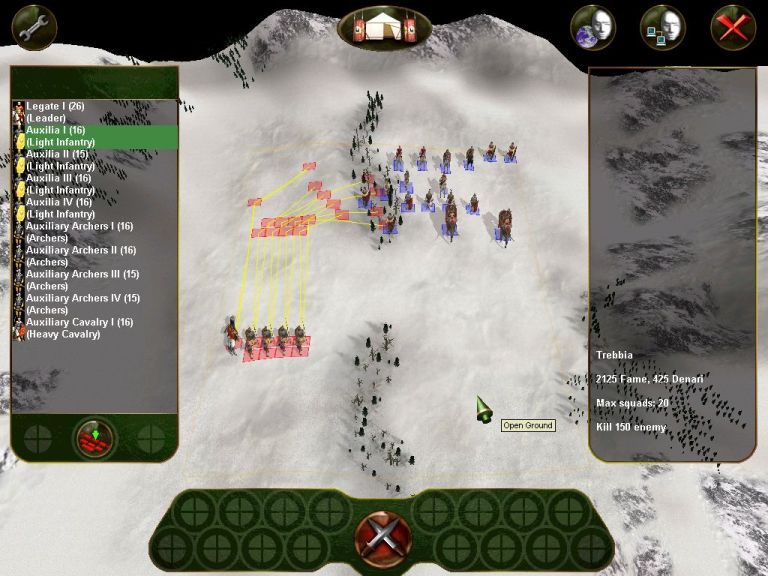
Image
The Conscript Revolt could be won without any pincushions, but as there are some enemy missile troops, the highlighted unit is meant to absorb the arrows and weaken the enemy light infantry. The plan is easy. Auxilia will hold the forest, Archers will support with overhead fire.
Another Archers join our ranks, and as the Campanian Allies scenario is full of enemy Skirms, lets purchase a Militia pincushions. My plan is to hold the forest once again, to fire the arrows once again, and to let the pincushions absorb the javelins once again.
Conclude the War is a limited casualties scenario, but I still bought the Scouts to TDT the enemy javelinmen. Most of my units hold the left flank, where there is a patch of scrub an rocky terrain. The extreme right is held by Auxilia, they'll destroy the Skirms and then they'll hold the position. I need to maneuvre enemy Spearmen into the rough, so wish me good luck...
Annexation of Etruria is the final battle of this minicampaign, and it will be also my final post for today... or tonight. I bought another Archers and made a defensive scrum around the rough terrain in the SE corner. There are some javelinmen on the enemy side, but having just a mere 15 Denarii, I can't get any pincushion. Maybe my Archers cripple them before they'll get in range.


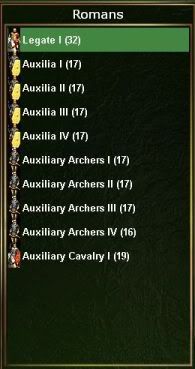
The Second Samnite War (the fifth minicampaign):
Ok, so I decided to stay for a while yet...
If you wish to Relieve Neapolis, you must take the enemy heavies into the account. I made a defensive line in SE with my Archers in rear. Hopefully they'll weaken the enemy before the lines meet. And I also purchased a pincushion Velites against enemy javelinmen on our left flank. There's a little woody area there, just a few trees, but enough for the Velites, who, been a missile troop, won't run from this place chasing the enemy, but they'll rather sit there until they'll be out of ammo. But our main concern is the SE corner... Btw, it's not a bad idea to shuffle your Archers, so that the best ones are hidden in the corner. Oh, and buy Stronger Bows to those that may use them!
Or not, if you wish to have your last Archers already during the Battle of Claudine Forks. I was 25 Denarii short, so I just bought bows and arrows and purchased Spearmen pincushions. I made a defensive cluster in the SW, copying the river line. One Auxilia held the right flank, the patch of rocks. Pincushion were sent forward to distract the enemy on my extreme left, where there are some light units and missile troops.
Plan for the Battle of Lautulae is very simple - arange your squads into two defensive lines, with Auxilia in the front, then position all your men into the forest. Get a pincushion Scouts to chase down the front Skirmishers, than provoke the rest of the enemy and lure him into the forest.
Etruscan Treachery is a time limit battle, and a tight one. Purchase a pincushion Nobles to speed things up. There's a vertical line of harsh terrain on left, so try to fight there. On your right there's another little rough patch, so get one Auxilia there, destroy the Skirms and hold the position. Nobles may kill the central javelinmen and then lure the enemy into the scrub.
Ok, so let THIS be the Final Battle for tonight... I bought the last one core squad, the Auxiliary Cavalry. I placed them against the Samnites' light infantry, so that the enemy has lesser jaeger units. The rest of my squads made a defensive perimeter in a forest, Auxilia in front, Archers back. I plan to TDT as many light units as possible, starting in the centre and making my way to the left. Then I'll run the Cavalry upwards and return back to seive routed enemy for some free experiences. The Auxilias need to hold the line, but as there lots of skirmishers, I'll buy yet another squad, some pincushion to eat the javelins.
Last edited by Aleksandr on Sat Jul 07, 2012 9:27 pm, edited 33 times in total.
Aleksandr
Administrative Corporal - SdKfz 251/1
Administrative Corporal - SdKfz  251/1
Posts: 142
Joined: Sun Feb 14, 2010 5:29 pm

Re: Legion Arena walkthrough

Post by Aleksandr »

Army after the last battle's healing:

Image

The Auxilias have an Advanced level of Swordsman, Feint, Endurance, on last two promotions I gave them also Drill, as my army became a bit bigger; the remaining one super secret tech is an Anti Infantry Specialist. Since now I'll upgrade their defensive skills too, starting with a Dodge. Archers have as much archery skills as possible, basic Drill and some Anti skills. Cavalry was awarded a Swordsman, Feint, Trample, Endurance and level 1 weapons and armour.


The third Samnite War (the sixth minicampaign):
I've decided to buy a pincushion militia squad for the next battle, because Etruscans have four Skirmishers that I can't chase down, as the enemy cavalry maneuvres all over the battle field. My Auxilia will hold the central forest, Archers are right from them, guarded by the cavalry. Once the enemy horsemen get in contact wih my infantry, I'll send the Militia forward, so that they'll eat some missiles. Once the rest of opposing squads reach my positions, Cavalry envelops them and seives whoever will try to run.
For the Battle of Sentium I've purchased a pincushion Scouts to TDT the Skirmishers on the enemy right flank. Aux. Cavalry will do the same to those on the opposite flank. Two Auxilias will slowly move into the scrub on my left. Center is held by the remaining two Auxilias and the four Archers are positioned behind them. This should be strong enough position to destroy enough that tries to close in, once the enemy left flank collapses, I'll encircle the rest of his guys with my horsemen.
I've maxed the equipment, leaving me with just enough Denarii for the Peasants squad. With the Samnites finally defeated, Rome will be the master of Italian peninsula. I've positioned most of my troops in the SW corner, only the Cavalry is in the front and ordered to charge the enemy heavies. Once I'll lure them to river, my light infatry defeatse them with no effort; then I'll overrun the routed. I should have given at least one Drill to the horsemen, but whatever, Legate's order points must be enough. (But then I must not lose him as I did during the last battle.) Once this will be over, I'll enter the forest and finish the enemy. Peasants will be given an honour to lead the final assault.


Gauls and Pyrrhos (the seventh minicampaign):
Siege of Arretium is a time limit battle, but his time the trouble is quite opposite than before - the limit is not too short, but it's too generous. I hid my men in the forest on my left flank, with Archers encircled by the Auxilia. I've thought that I don't even use the Cavalry for this battle, but then I decided otherwise. Maybe they'll be able to zigzag into the enemy rear and destroy the light infantry in the open.
Battle of Vadimo Lake is a brutal encounter, however with lots of light infantry, this can be funny; you just need to occupy the scrub and rocky terrain and then lure the enemy into it. Take care of enemy javelinmen, I bought a militia to eat the missiles. Hold cavalry in reserve, so that they may clog any puncture. If things go extremely bad, you may run the Archers to the north and hide them behind the Auxilia. I finished this battle with 156 losses on my side and it cost me some 800 fame to heal.
It's quite hard to make some reasonable advice on the Cisalpine Gauls battle, as there are far too many factors. I will hold center with Auxilias and Archers, hoping that the bowmen will bow down anyone trying to reach them. On my left flank I plan to TDT the Skirmishers (I need to move them of the scrub first), on my right I'll destroy them with pincushion Militia. (I'd use Scouts, but well, I forgot to save gold for them.) My Archers must not waste arrows on enemy Skirmishers, so once they'll fire the first salvo, I'll redirect them on the approaching enemy infantry. Next step is to enter the scrub with an Auxilia or two, and destroy all the unlucky heavy units stuck there. Wish me good luck... Thanks, it helped! I payed some three hundred fame to refit my guys. (Mostly the two Auxilias that were captured on their way towards the scrub ground.)
I've bought two pincushion Militiamen for the Battle of Heraclea. The enemy has two Archers, so my core needs to avoid their fire. This battle tends to change into a real massacre pretty fast, so I really wish to kill the 180 needed enemy men asap. There are hordes of light infantry on the enemy right flank and these could be an easy pick. However, these are not enough, so I decided to zigzag my Cavalry against the enemy Archers, once some hole opens.(edited) It didn't happen, and instead of moving through the hole, I needed my horsemen to cement one. But after all, I've lost just six men during this battle, not counting the poor Militias. (edited)
Battle of Ausculum is a survival battle and I've decided to not waste the lives of my men here. I positioned them in the SW area where there is enough rocky space to hide from the enemy heavies. Cavalrymen are ordered to charge into enemy rear and destroy the light infantry in reserve. They could also attack the Archers, but I don't want to lose my core units' men, thus the Militia pincushion get this order. Once the battle will be nigh over, I'll seive the enemy guys. There are a lot of them, so I believe that the Cavalry makes not only one, but rather two levels.
I don't like the Battle of Malventum, because Pyrrhos has lots of Archers and heavy infantry here. The best idea is to make a defensive line in river, but you need to distract his bowmen first. Enter Peasants. Once the enemy right flank collapses, you may send the cavalry to exploit the weakness and destroy the Archers. Just take care to not end in a scrub or river. In the meanwhile your Auxilia destroys elephants and heavies; just take care to end in a scrub or river.


The First Punic War (the eigth minicampaign):
Battle of Messana is a limited deployment skirmish. You want the heavy cavalry here and as many Archers as possible. There's some scrub ground in the SE, you may build a defensive position around it. Keep Cavalry close, in case you'll need them to repel the enemy horsemen.
For the Battle of Aggreigentum I haven't invented any better plan than just wait at the bottom of the map and let the enemy come for the missiles. I purchased two Militia baits, but I don't think that they'll do much, but at least they'll clog the centre and hopefully they'll eat an arrow or two before the enemy routes them.
During the preparations for the Battle of Alalia I resigned on pincushions. I decided to not take care of enemy archers, and as there is a great area of rocky terrain on the battlefield, I'm not going to have much trouble with enemy heavies. I've build a solid defensive perimeter there and then I've sent the Cavalry charging into the enemy rear. I hope they'll seive lots of experiences.
For the Battle of Adys I built a usual defensive line of Auxilias and set them to charge into the scrub patch at the top of the map. Once the battle starts, it is good to manually force them to run, because those few seconds lost by throwing the pila might be exactly the reason why they don't make it into the safety of the rocky terrain. I took a Militia pincushion and placed them into the forest on the very east, where they charge towards the enemy. Hopefully they'll be fast enough to absorb some javelins. On the opposite flank (the left one) there are my cavalrymen. They'll TDT the westernmost Skirms and then I'll use them as the situation will dictate.
Terrain for the Battle of Baggradas is very unfavourable for the light units, however, we have a plan. First of all, I purchased a Velites pincushion to get rid of the Skirmishers on the enemy right flank. I could have used any other unit, but I hadn't used Velites for quite some time, and they will definitely not attack the enemy guys in hand to hand, so even if they'll fail, at least the Punic guys waste their ammo. On my right flank I positioned the horsemen to chase down the second Skirms; once this will be achieved, they'll be ready to attack the rear of approaching enemy. After these initial stages are over, there will be a big scrum. I hope that I'll be able to keep the fights in the "forest", but well, it can't be always done, as the woody area is extremely small. Thankfully the enemy comes in waves, so once I'll get rid of the first one (and I hope that my Archers will be helpfull), I may regroup. I plan to overrun the routed (unless it'll be my cavalry who ends routed) and if I'll have enough arrows left, I may even provoke the enemy reserves into a suicidal attack.


The Second Punic War (the ninth minicampaign):
At the start of the Battle of Trebbia all my squads are at level 15 or 16, with honourable mention of level 26 Legate. Auxilias have level 2 or 3 of the usual stuff (weapons, armour and boots), I gave basic helmets to the Archers and the Cavalry has level 3 armour and helmets, plus a level five swords. And I need just some 200 Denarii to equip them with Sarmatian Cavalry Armour. I don't wish to meet the elephants, namely not in the open, so I placed my units in the far west and ordered them (via waypoints) to move in a big arc, with a final destination been the upper forest. Here they'll be safe. Auxies won't be hurt and the Archers will support from the back. My only concern are the enemy horsemen, but I'll order my Cavalrymen to stand between them and my light troops. If need arises, I'll attack them, if they won't be fast enough, I may just seive the enemy. ---> click <---
At Trebbia I pushed the screening force back... so hopefully I'll be able to win even the Battle of Cannae. This battle is quite hard, as there is not a single piece of wood nor a river or scrub, and due to this I will face the enemy cavalry in the open. I really need to stop them from overrunning my core, and therefore I bought an exceptional number of four Militia pincushions. They'll take a portion of the scenario's experience bonus and I'd rather use less of pincushion squads, e.g. double Spearmen or something like that, yet I simply can't due to lack of money. and I rather lose a bit of experiences than lots of men, so four Militias. I hope that they'll slow the cavalry at least for a moment, just a few seconds, during which my Archers get one or two additional salvos. Once the horsemen's stregth will be brought below 20, I don't fear them anymore. My own horsemen stay in reserve, and if they won't be necessary elsewhere, I'll try to sneak upwards and then turn into the enemy back. If they'll hit some big scrum, they may gain lots of experiences from seived units. (edited) So, although the number of necessary kills was 250, I seived over 100 additional kills. The four Milita ate 429 experience each, which means that they have stolen some 1700 exp. from my core. Otoh, without their help the enemy horsemen would surely breakthrough. (edited)
Battle of Dertosia. There's a forest on the right flank, and I ordered my Auxilias to march there, followed by the Archers. The Cavalry took out one of the Skirmishers and then they've returned to reserve. I placed a Militia into the scrub terrain by the shore, where they delayed the enemy riders. Our men are superior to the enemy, but you really wish to lure the heavies into the forest. Once you'll get rid of them, it's a piece of cake. Seive some experiences, of course. Not counting the automatically healed units (and the pincushion Militia), I've lost just six men here.
The level 17 elephants at the Battle of Illipa are annoying, because with my core it may take an enormous time and effort to destroy them in the open. Therefore I used a Nobles squad as a decoy to lure them into the forest, but surprisingly enough, this time my Archers had quite a good luck and destroyed the elephants in few salvos. Auxilias rushed to the forest and once the Archers got rid of the named elephants, they followed in Auxilias' wake. Legate together with the AuxCav made a big arc and attacked the enemy Archers from the back.
For the Battle of Zama I purchased two pincushion Militias and sent them charging straight forwards through the central rocky ground. Rest of the infantry followed them, procession ended with the Archers. It is reasonable to halt one Auxilia once our Archers get in range, and baby-sit them, just in case someone (most often Garlic Cavalry) tries to attack them. On my left flank I ordered the Cavalry to charge the central squad of infantry heavies, and they TDTed the scrum till death.
Last edited by Aleksandr on Sat Jul 07, 2012 9:44 pm, edited 38 times in total.
Aleksandr
Administrative Corporal - SdKfz 251/1
Administrative Corporal - SdKfz  251/1
Posts: 142
Joined: Sun Feb 14, 2010 5:29 pm

Re: Legion Arena walkthrough

Post by Aleksandr »

They say that one picture is worthy a thousand words, so:

Image

I must admit that although nearly everything goes fine, one thing wasn't (and won't be) accomplished - this won't be a "no-loss" run. I already lost some battles, I can't even remember which one was the first, but I restarted Aequi Riders, because of an ugly mistake. Looks like the game is too hard even for such an addic... assho... I mean, such an experienced legate as me. Maybe on Hard? Nevermind...

For those interested, I may add a little bit more informations on my army:
Auxiliary Legate: maxed Swordsman, Feint, Endurance and all tactical skills, Expert Block, of course Frenzy; not a single piece of equipment.
Auxilias: Expert Swordsman and Feint, Master Dodge, Advanced Endurance and Drill, basic Anti Infantry, Disciplined Formations; level 3 armour and swords, level 4 Boots, level 1 helmets.
Auxiliary Archers: Advanced Drill and Anti Inf+Cav, Disciplined Formations, Grand Master Marksmen I, Expert Weakspot Targeting, Skirmish; all the usual Archers' stuff plus basic hats.
Auxiliary Cavalry: Feint, Swordsman, Trample and Endurance at Master level, Frenzy and Drill; 5/4/3 weapons/armour/helmet, Sarmatian Cav Armour.


Hellenistic Monarchies (the tenth minicampaign):
2nd Macedonian War aka Cynoscephalae is very fast and brutal scenario. On the right flank I charged the enemy with pincushion/decoy Scouts, so that they lure the heavies into the harsh terrain. Center was held by Auxilias and Archers, on the left flank the leader with Cavalry advanced against enemy cavalry. Time limit is a problem here, but also the powerful enemy.
During The Syrian War aka Magnesia battle we are extremely outnumbered. I occupied the centre with a usual positioning: Auxilia forwards, behind them Archers, right flank Cavalry reserve, and there were Spearmen pincushion unit at the tip. I really need to shot down the enemy Archers, as they are woefully devastating for my light troops. The enemy left flank is also quite dangerous, while the right one, composed of light troops, is not that important. Once I'll get rid of the Archers, I'll concentrate on the heavies on the enemy left. If there will be any hole for the Cavalry, even better...
I've acquired one Militia pincushion for Ambush at Cypsela. The enemy has two Archers and there's no need to lose men to their fire. Sad thing is that I must win fast, because the time limit is very tight. I order my Auxilias into the forest, where they should take care of any opposition. Cavalry rides on the very right, their task is to get rid of opposing Cavalry and then kill the enemy leader, who happens to be "a leader too far". This battle is not hard, but sometimes I'm not fast enough.
For the Battle of Pydna I purchased a pincushion Scouts to bother the enemy Archers. Auxiliary Cavalry waited in reserve on the left flank, rest of troops attacked in the centre.This is very similar battle to one of the previous scenarios. Just get your light units in the scrub and all is fine. Fail, and you'll lose 153 soldiers... :(


Trouble in the North (the eleventh minicampaign):
Although the Battle of Avignon is another time limit mission, there's a lot of time here. I placed my men on the left side (4 Aux, Cav, 4 Arch) and set them to charge. Horsemen will chase down the enemy Archers, Auxilias will kill the Fanatics in forest, Archers will blast the other Fanatics before they'll even know what's happening. Once this is over, I'll order my units to the right, shot or ride down the enemy Archers and then dispose of the rest. Key is to not hurry, as the time limit is really generous. (edited) I seived insane amount of routed enemy infantry, and my Cavalry was awarded 4989 experiences for this battle. (edited)
Giants of Noreia is yet another one fairly fast but very brutal battle. I positioned my units in the center with double Militia pincushion in front. (One wouldn't last long enough.) Then I rode all my light units into the river bend right before the giants. Hopefully they'll end in the boggy ground and I could destroy them there. Once there will be a hole in enemy lines, my Cavalry (placed in the very right) will chase the Archers. There's a small patch of scrub terrain in the central left. That's where my last Auxilia waits for the enemy horsemen.
And one another fast and furious scenario, the Battle of Aginnum. I positioned my squads in defensive perimeter in SW corner and ordered the Militia to eat some arrows and provoke the heavies. Rest of my guys waited in the mud for the enemy to come. Archers took away their Gallic counterparts and Cavalry was in reserve on the far left, to stop approaching light infantry. Once the enemy right flank collapses, it is time to run the horsemen forward and encircle the enemy.
You need to kill 200 men in Battle of Arausio. As these should be the enemy men, not ours, and because there's a very nice forest down in the SE, I just placed all my men right there. They'll down anybody approaching, the ones that get close enough will be destroyed by the Auxilia. Pincushion Militia will distract the enemy Archers and once the end will be nigh, I'll order my Cavalry to destroy the routed - unless they'll have some other task.
Battle of Aquae Sextiae is bugged! Instead of killing the general, you must destroy another unit... and I still can't realize which one it is. but as long as I know that it's some guy a bit left from the center, I always attack on my right flank, so that I kill as many squads as possible. 8) But it's not the very best idea, I know, because time limit is short... Once I'll find out which one squad is the right one to destroy, I'll edit this post. My plan? I create a defensive scrum around the central rough patch, two Auxilias hold this position, the third one together with the Cavalry attacks forward, Archers support the action. One Auxilia must stay at home, sad, sad... (edited) The unit to kill definitely ISN'T one of those: both Archers, both Cavalries, General :roll: (edited)
My men are entering the Battle of Vercellae completely equipped, they have most of the things they need for the rest of the game. Now I will save gold for legendary stuff, as I don't buy equipment of level six and greater - it's too expensive. I build a balanced line in center of battlefield (2 Arch, 4 Aux, 2 Arch, 1 Mil) and ordered those men to charge. They'll destroy the initial wave effortlessly, but the real carnage starts in the forest. I hope that the Militia eats at least some arrows, but I won't order my Cavalry to hunt those Archers, as they'd be massacred by ranged attack.


The Third Servile War (the twelfth minicampaign):
Several of the battles in this minicampaign are extremely short. I think that such an elite core as I have is quite good for this kind of scenarios, because it's easy to manage and has some punch.
Mount Vesuvius is one of the most straightforward battles ever. Position the men into two rows with Auxilia in front of the Archers and "Forwaaards!". It's a good idea to shot down the Skirmishers. Cavalry should encircle the enemy and charge the most far squads - the time limit is really tight.
Battle of Granachus is also a pretty fast battle with even tighter time limit. There's a good trick how to speed up the things: form your men in an offensive line (Aux, Arch, Aux, Arch, ... Cav) so that they are not spread all over the map and also because you wnat the Archers to be as forward as possible. Cavalry is meant to counter the enemy Cavalry, so synchronize their action with the rest of your guys: you don't want the enemy to overrun your infantry, but you don't want you Cavalry to become encircled, too.
Crossing the Alps aka On the Way to Freedom. Normally I assault the enemy here, but as I decided that I won't be losing fame, I'd play more cautiously. I bought a very fine pincushion - an Auxiliary Cavalry. Their goal is to distract (and hopefully destroy) the central Archers, that otherwise vex my units. The core Cavalry rides by the western edge and destroy skirmishers and anything in path. Rest of the units will slowly, timidly move forwards where they make a defensive arc somewhere in the woods.
Time for yet another spectacular pincushions - A Small Victory. I bought another Aux Cav to get rid of Archers in the enemy frontline. Core Aux Cav followed on their left and attacked the Light infantry, so that I may breakthrough and kill the hidden Archers. I placed all my ranged units on the left flank, to cripple the dangerous Fanatics and to support the break. Auxilias were spread whereever possible, mostly around the water line.
I haven't enough money for both elite cavalry stuff, so the horsemen will enter the End of the Dream with just the Achilles' Armour. And as I was 10 Denarii short of purchasing a better infantry pincushion, I just bought the Hastati. They'll be used to slow down the enemy cavalry. This battle is very straightforward, just wait for the enemy to come. It's a reasonable idea to get rid of his skirmishers. Other than that, just wait in defensive lines.


We've started with a picture, so we'll end with a one, too. Follows my core army before entering Caesar's service.

Image
Last edited by Aleksandr on Sat Jul 07, 2012 9:55 pm, edited 30 times in total.
Aleksandr
Administrative Corporal - SdKfz 251/1
Administrative Corporal - SdKfz  251/1
Posts: 142
Joined: Sun Feb 14, 2010 5:29 pm

Re: Legion Arena walkthrough

Post by Aleksandr »

Caeser's Gallic War (the thirteenth minicampaign):
Do I count it right? Nevermind...
Battle of Bibracte is a perfect opportunity for a massive experience hunt. The enemy is totally static and his units are weak, so lets make this a turkey shooting. After all, our Archers need some levels. Therefore I placed all the Archers, one Auxilia baby-sitters and a Cavalry unit for overruns. An opposing leader must be killed, which of course means that you must not kill him, if you wish to harvest all the available experiences. It's an easy battle, but I restarted it, because I was greedy and thus made a mistake.
For the Battle of Mulhouse I've bought a Triarii pincushion and placed them in front on my right flank, to absorb the cavalry attack and arrows. Archers were in center and they should cripple incoming enemy, so that the Cavalry has little work, and they all destroy the enemy missile troops. Stay far enough from the enemy Archers. On the left I held the forest and once the battlefiled cleared a bit, I ran Auxilias forward.
I bought pincushion Praetorians for Battle of Sambre River and placed them in front of my units that made a defensive cluster in SE corner of map. Btw, it's also possible to place the Auxilias in forest, but this way they'll get under the fire much sooner and the enemy light infantry becomes a factor. Idk, this battle is the one that I really can't play well.
On the contrary, Ambush at Divo is one of the funniest and most straightforward battles ever. I place all Archers east from the forest, put two Auxilias into the woods to guard the accesses and order the Cavalry and Legate to advance against the eastern enemy column.
Design of Siege of Alesia is very similar to one of the previous scenarios, so we'll use the same tactic: infantry and Archers wait in the forest. I've kept the best Auxilia at home (and bought no pincushions), as I really wish to make some experiences with Archers. After all, I've already wasted some of the battles, and as this run won't become my best record, so I can lose some fame to the enemy fire. Cavalry is ordered to encircle the enemy. I hope to get the opposing Archers during march, but I must not get trapped inside the scrum.


The Civil War (the fourteenth minicampaign):
The final minicampaign starts with another archery range, the Battle of Pharsalus. It's a little pity that the enemy center is held by mere Militia, I'd rather seen some heavies there. This way my Cavalry must TDT at the left flank, where there are lots of free experiences. Just take care to not stuck in the enemy formations. Rest of my squads hold the right flank. I'll keep two Auxilias at home, so that the Archers will get much greater share of experiences. There's a wide scrubby space where I plan destroy the enemy horsemen. By the time his Skirmishers get in range, most of the enemy should be dead, and wouldn't take much time to finish the battle before I'll lose too many men.
First Oddyseus' Bow awarded, the Battle of Nicopolis may start. It looks like yet the Archers get the legendary bow very soon, they're at level 25, 24 and 24. There are lots of enemy missile troops and not enough scrub to hide from the cavalry, so I purchased a double Legionary pincushion. Core hides behind the patch of harsh terrain.
I've placed the foot soldiers in a usual two lines in the centre of the field of the Battle of Zela and ordered them to advance. A core cavalrymen were ordered to encircle the enemy and get rid of archers, another Aux Cav was used as a bait to direct the enemy heavies into the difficult terrain. Note: it's important to not waste time during this mission, as the enemy cavalry is quite far away. And it's of even greater importance to halt the light units in scrub, unless you wish to lose 78 men.
I've placed just eight squads in Africa; the obvious Legate, only two Auxilias that have a chance to hide in the scrub before the horsemen get them, all Archers and the Cavalry. They were all positioned in west, with leader deep in the scrum, Auxila on top ordered to charge into the harsh terrain, horsemen were in reserve, ready to stop the cavalry charge. I'd be much better of with an experienced Triarii here, but well, one can't have everything.
Battle of Thapsus is a hunt for the General once again... and it's bugged once again. But this time it's the other way around - you'd rather wish to not kill the leader asap, as there's no time limit. But well, for now I really don't have a clue who's the target ,so just destroy anyone in range of your bows, swords and hoove. Just charge anybody and harvest the experiences. Btw, I smell at least one other Odd Bow, but maybe even two of them. (edited) Seems like the target is one of the light infantries on enemy left flank. (edited)
I've had over three thousand Denarii before the Battle of Munda, so I bought the weapons and armour of level six to my Auxiliary Cavalry (of level 30), although I swore to not waste money on these items. But well, you know the advice about great love and attention on your heavy cavalry. Then I've realized that this is the penultimate scenario and that there's not much reason to save money, so I improved my men's equipment even further, although I still kept some money for a pincushion elephant - just for the fun of having a dumbo. I've made a bit unusual defensive scrum around the very usual defensive position in the SE corner and ordered my units to hold for long. Once the enemy gets closer and once at least the cavalry will be finished, I'll order my pachyderms to stick their necks for the the others... and I hope that their necks are thick enough to withstand some sticks. There's nothing more to plan, but it's a good idea to get rid of the Archers and then seive some free experiences. (Not that the latter one matters anymore.)
So the final scenario is here, the Battle of Philippi. I've bought the third Odd Bow, finished (unnecessary) upgrades and purchased a Hastati pincushion to abosrb some arrows before I'll get rid of the enemy Archers. (It's also possible to try to break through and get them in hand to hand, but well...) Auxilias stood behind the patch of rocky ground in the SW, Archers were in the middle with Aux Cav and Scouts baby-sitting them. I've thought of the Scouts as a bait, but the battlefield is small, and the Archers would destroy them before they'll lure anyone anywehre. So they are meant to buy few seconds and to absorb an infantry javelins.


So, it's over. From the dark ages to the birth of an empire, I once again defeated all the enemies of Rome.
I need to digest this experience before I'll write something more. Good night!
Last edited by Aleksandr on Sun Jul 08, 2012 11:27 pm, edited 18 times in total.
Aleksandr
Administrative Corporal - SdKfz 251/1
Administrative Corporal - SdKfz  251/1
Posts: 142
Joined: Sun Feb 14, 2010 5:29 pm

Re: Legion Arena walkthrough

Post by Aleksandr »

AUXILIA

(Very Hard)


Image

Legate 66
Auxilia 24
Auxilia 26
Auxilia 24
Auxilia 24
Auxiliary Archers 28
Auxiliary Archers 26
Auxiliary Archers 25
Auxiliary Archers 26
Auxiliary Cavalry 32


Denarii: 1 215
Fame: 1 138 480
First loss: Aequi Riders, resp. Men in Black
:roll:


I feel that this composition is very strong, but it has its flaws, too. First of all, I should be a little bit less meticulous when it comes to the core structure's design. It's nice to have sorted squads, but I should have bought the first Archers before the fourth Auxilia. They'd have the Odd Bow a bit sooner. The other thing is that the core was sometimes lacking a punch and/or wasn't big enough to fill all the holes. It looks like that one additional unit of each squads' type would be helpful. I also need to evaluate my thought on heavy cavalry, because after all the upgrades and promotion, the initial difeerences between the Nobles and the Auxiliary Cavalry is merged.

I need to be more meticulous when it comes to the battle command. I've spoiled some battles and thus I was once again unable to break the 1 140k threshold. And i also wasn't able to not lose a single scenario, although there are not many of them that pester me now. After all, I've already played the game for a few times.

It's a little pity that there are some annoying bugs that spoil the gameplay. Two of the hunt-for-the-general scenarios have an incorrectly set target squad, the other very bothersome thing is the disengagement or "go gaga" bug that happens sometimes.

A full report is available right here.
pgeerkens
Senior Corporal - Destroyer
Posts: 121
Joined: Tue Jun 03, 2008 9:47 pm
Location: Hamilton. Ontario

Re: Legion Arena walkthrough

Post by pgeerkens »

Hi Aleksandr,

A thought for your campaigns: start with two Scouts instead of one Auxilia. While your auxilia will get almost no experience during the first few battles, the scouts can rapidly be raised to level 5 or 6, becoming useful until very late in the campaign.

Pieter
Aleksandr
Administrative Corporal - SdKfz 251/1
Administrative Corporal - SdKfz  251/1
Posts: 142
Joined: Sun Feb 14, 2010 5:29 pm

Re: Legion Arena walkthrough

Post by Aleksandr »

pgeerkens wrote:Hi Aleksandr,

A thought for your campaigns: start with two Scouts instead of one Auxilia. While your auxilia will get almost no experience during the first few battles, the scouts can rapidly be raised to level 5 or 6, becoming useful until very late in the campaign.

Pieter
I've already thought of something similar, however I fear that the Scouts won't have enough punch...
pgeerkens
Senior Corporal - Destroyer
Posts: 121
Joined: Tue Jun 03, 2008 9:47 pm
Location: Hamilton. Ontario

Re: Legion Arena walkthrough

Post by pgeerkens »

They easily have enough punch for the first half of the campaign, or a bit longer; that is the strategy I use on GBOR when Auxilia are not available until very late. (I have reached 1,144,620 in Legion Arena, and 1,137,xxx in GBOR; of course I both use pincushions shamelessly and as decoys; and re-run battles until i am satisfied with my strategy, and that I have not had in ordinate bad luck.)
Aleksandr
Administrative Corporal - SdKfz 251/1
Administrative Corporal - SdKfz  251/1
Posts: 142
Joined: Sun Feb 14, 2010 5:29 pm

Re: Legion Arena walkthrough

Post by Aleksandr »

pgeerkens wrote:They easily have enough punch for the first half of the campaign, or a bit longer; that is the strategy I use on GBOR when Auxilia are not available until very late. (I have reached 1,144,620 in Legion Arena, and 1,137,xxx in GBOR; of course I both use pincushions shamelessly and as decoys; and re-run battles until i am satisfied with my strategy, and that I have not had in ordinate bad luck.)
I think I'll restart the run in a near future, because the army is awkward...
Post Reply

Return to “Legion Arena & CoM”